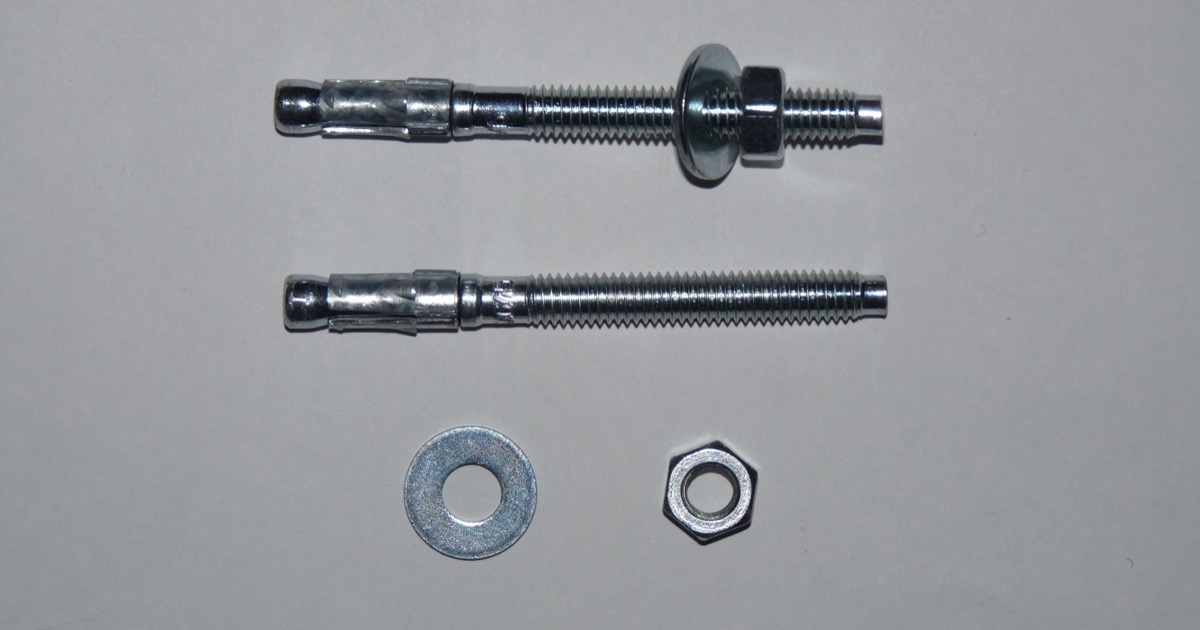
Quick answer: most residential slabs take a standard 1/4 inch concrete screw kit, so start with a full-length kit like the ITW Brands Tapcon 1/4"x5" that already bundles the correct masonry bit; go with the plain Tapcon 1/4"x5" hex-head pack if you already own the right masonry bit, and step up to the Red Head TruBolt 3/8"x3" wedge anchors when your safe's floor holes accept a larger bolt and you want the strongest hold a residential slab can give.
Why an Unbolted Safe Is Not Actually Secure
A gun safe's lock and steel gauge only matter once the safe cannot be removed from the house. Every biometric pistol safe we track in our biometric gun safe comparison ships with pre-drilled anchor holes for exactly this reason: a 5 to 15 pound unit is carried out under one arm if it is not fastened down, and a 300 to 600 pound long-gun cabinet is rolled out on a furniture dolly by two people in about the same amount of time. Anchoring does not need to be permanent or invasive. It needs to convert "grab and go" into "grab, fail, and leave."
What You Need Before You Start
Four things determine whether this is a 20-minute job or a frustrating one: a hammer drill (a standard drill/driver will not bore into cured concrete), a masonry bit sized to the anchor, a shop vacuum to clear dust from the hole before driving the screw, and anchors long enough to reach at least 1.75 inches into the slab once you subtract the safe's floor thickness. Most kits sold for this job, including the picks above, already bundle the correct masonry bit so you are not guessing at sizing.
The Install, Step by Step
Position, Mark, Drill
Set the safe in its final position, since moving it after anchoring defeats the purpose. Open the door and mark the pre-drilled floor holes onto the slab with a punch or marker through each hole. Move the safe aside, put on eye protection, and drill each mark with the hammer drill on hammer mode, going about 1/4 inch deeper than the anchor's length to leave room for drilled dust at the bottom of the hole.
Clear, Reposition, Drive
Vacuum each hole; dust left in the bottom keeps the anchor from seating and can strip the threads on the way down. Slide the safe back into position, lining the floor holes up with the drilled holes. Drive each anchor with a nut driver or socket, not an impact driver, until it seats snug against the safe's floor. Do not chase maximum torque; a stripped hole in your slab is harder to fix than a slightly loose first pass.
Check the Pull
Once all anchors are in, try to rock the safe from a top corner. It should not shift. If one anchor point feels loose, back it out, vacuum the hole again, and consider stepping up to a slightly longer anchor rather than over-torquing the same one.
Anchor Kits Compared
Sizing and price tier checked against the current Amazon listings at the most recent update.
| Kit | Screw Size | Count | Bit Included | Best For | Price | Link |
|---|---|---|---|---|---|---|
| ITW Brands Tapcon Hex Washer Head | 1/4" x 5" | 100 | Yes | Standard residential slabs, thicker floor gaps | $$ | View |
| Tapcon Hex Head Masonry Screw Anchors | 1/4" x 5" | 100 | Check listing | Same spec without the bundled bit | $$ | View |
| Red Head TruBolt Wedge Anchors | 3/8" x 3" | 50 | No | Larger floor holes, maximum holding strength | $ | View |
Price tiers are approximate. $ = under $50, $$ = $50 to 150, $$$ = $150 to 300, $$$$ = over $300. Tap any link for the current Amazon price.
Mistakes That Undo the Whole Job
The failure modes are consistent enough to call out by name. Drilling into a control joint or crack: the straight grooves cut into a garage or basement slab are stress-relief joints, and an anchor driven into one has far less surrounding concrete to bite into. Move the hole pattern a few inches if a mark lands on one. Skipping the vacuum step: dust compacts at the bottom of the hole and props the anchor up before it is fully seated, which reads as "tight" on the driver but leaves the threads barely engaged. Assuming a garage slab is full depth everywhere: some garage floors are thinner near the door track or perimeter forms. If a test hole feels like it is drilling through to nothing after 2 to 3 inches, stop and relocate rather than forcing a longer anchor into a thin section. Over-torquing: a concrete screw driven past its stopping point strips the hole and has to be redrilled larger or relocated, so stop at snug rather than maximum driver torque.
Owner Feedback Themes
Themes pulled from verified-purchase Amazon reviews and active subreddits (/r/CCW, /r/guns, /r/preppers, /r/homedefense, /r/personalfinance) as of August 2026:
- The bundled masonry bit is the most-cited reason buyers pick a specific kit. Owners who bought anchors without a matching bit report having to make a second trip to a hardware store, which is the single most common complaint in this category.
- Renters and apartment dwellers ask about alternatives to drilling most often. Community threads consistently point out that concrete anchoring is not an option in a leased unit, and the practical workaround discussed is bolting into a closet's wood subfloor or framing instead, or choosing a heavier safe that is harder to move without anchoring at all.
- Garage installs draw more troubleshooting questions than any other location. Slab thickness and hitting a control joint come up repeatedly as the reason a first attempt did not seat properly.
- People who skip anchoring almost always cite one reason: they assumed the safe's weight alone was enough. Owners who later added anchors after a near-miss or a break-in attempt describe it as the fastest security upgrade available for the cost.
These notes are aggregated from public reviews and forum discussion. Safe Picked does not own or test the products listed and does not make first-person claims about hands-on use.
Jacob’s read on this category
Anchoring gets treated as an afterthought because the safe's own manual usually buries it as a single diagram with no torque spec and no guidance for what to do if you hit a control joint. That gap is exactly where installs go wrong: a stripped hole from over-torquing, a loose anchor from skipped vacuuming, or a garage slab that turned out to be thinner than expected near the door track. None of that shows up until you try to rock the safe after the fact. The fix costs about as much as a single takeout order and roughly 20 minutes, which makes it the highest return-on-effort step in this entire category, and it is the one most owners find out they skipped only after something goes wrong.
Common Questions
Do I really need to bolt down a gun safe if it is heavy?
Yes. Hand trucks and appliance dollies make weight alone an unreliable deterrent, and insurers increasingly ask whether a safe was anchored before paying a burglary claim. Small biometric pistol safes are fully portable by one person, which is why manufacturers pre-drill anchor holes even on lightweight units.
What size concrete anchor should I use for a gun safe?
Match the anchor to the safe's pre-drilled holes, almost always 1/4 inch or 3/8 inch. Aim for at least 1.75 inches of embedment into the slab after accounting for the safe floor and any mounting plate, which typically means a 3 to 5 inch screw. Confirm the torque spec in the safe's manual before tightening.
Can I bolt a gun safe to a garage slab?
Usually, but check slab thickness and edge distance first. Garage slabs can be thinner at the perimeter or interrupted by a control joint or door-track footing. Drill a test hole away from any visible crack or joint, and relocate if the slab feels thin or hollow.
What tools do I need to bolt a safe to concrete?
A hammer drill with the correctly sized masonry bit, safety glasses, a shop vacuum, and a socket or nut driver sized to the anchor head. Most concrete-anchor kits sold for this job include the matching masonry bit.
Selection Criteria
The anchor kits above link to live Amazon listings from established fastener brands (Tapcon, ITW Brands) that ship within the United States, with a weekly sweep for price-tier drift and dead listings. If your safe's manual specifies a different anchor diameter or embedment depth than what is described here, follow the manufacturer spec; it overrides the general guidance in this article.
For the safes themselves, see our long gun safe comparison for cabinet-style options and our vehicle gun safe guide if you are securing a mount inside a vehicle rather than a home slab.
If you spot a product that has been discontinued or a price that is stale by more than 15 percent, let us know.